
Infectious Smile Build and Survive Traps: Defensive Blueprints and Setup Guide
Infectious Smile build and survive traps rely on Laser Gates, Spike Traps, detectors, and moving mechanisms to eliminate Smilers instantly. Placing hidden floor lasers or automated gun rigs creates lethal choke points that protect your base from incoming infected players.
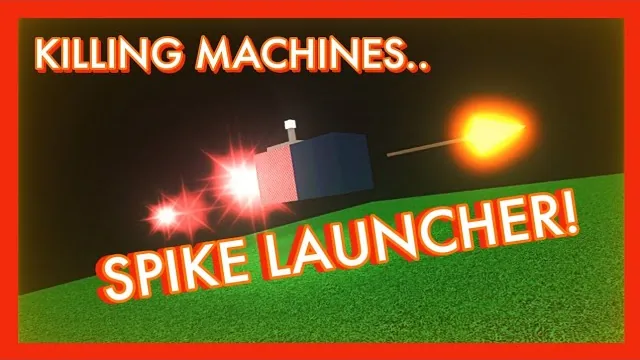
Infectious Smile build and survive traps rely on Laser Gates, Spike Traps, detectors, and moving mechanisms to eliminate Smilers instantly. Placing hidden floor lasers, kinetic hazards, or automated tripwire rigs creates lethal choke points that protect your base from incoming infected players while keeping your team safely insulated behind reinforced walls.
Essential Trap Components in Build and Survive
Defensive contraptions in build and survive leverage a combination of lethal fixtures, power conduits, and mechanical rotators to counter infected waves:
- Laser Gates: Produce a lethal energy beam across open gaps. Laser Gates eliminate any infected player or survivor who steps through the active beam. They can be triggered by switches, proximity detectors, or direct contact with adjacent active gates.
- Spike Traps: Retractable physical spikes mounted to surfaces. When activated via levers or pressure triggers, they thrust outward to impale approaching Smilers instantly.
- Proximity Detectors & Pressure Plates: Sensor modules that send power signals when a player steps within range or directly onto a plate. These allow you to automate trap activations without manually pulling levers during chaotic breaches.
- Motor Hinges & Wheels: Powered rotating joints used to spin beams, swing trapdoors, or cycle sweeping laser blades continuously across defensive corridors.
- Reinforced Steel and Iron Blocks: Blast-resistant plating required to shield sensitive wiring, levers, and trap emitters from Smiler bombs and explosive projectiles.
Lethal Trap Blueprints and Setups
Effective trap layouts force Smilers into narrow kill corridors where escaping or dodging the damage radius is impossible.
1. The Concealed Floor Mine
The concealed floor mine catches sprinting Smilers off-guard as they attempt to breach an open entrance:
- Dig or recess a one-block trench directly across your entrance threshold.
- Mount two facing Laser Gates along the bottom edges of the recessed trench.
- Position an automated Pressure Plate or Tripwire Detector directly in front of the threshold, wiring it to complete the circuit when stepped upon.
- Camouflage the gap with a thin lattice or recessed grate so approaching infected players cannot spot the active beams until their avatar has already triggered the switch.
2. The Narrow Laser Grid Corridor
Smilers rely on lunging speed to infect survivors. A multi-tier laser corridor neutralizes fast runners by stacking damage across different jump heights:
- Construct a choke point hallway exactly two blocks wide and three blocks high.
- Install a low Laser Gate one block above the floor to eliminate crouching or sliding Smilers.
- Mount a second Laser Gate two blocks up, staggered slightly behind the first gate, to catch Smilers who attempt to jump over the bottom barrier.
- Wire both gates to a single master lever inside your inner bunker so defenders can toggle the gauntlet safely when friendly survivors need to enter.
3. The Kinetic Spin Sweeper
For open base perimeters, automated spinning hazards clear crowding infected mobs without expending ammunition:
- Mount a high-torque Motor Hinge facing downward from an overhanging structural beam or upward from a reinforced floor pedestal.
- Attach lightweight reinforced beams extending three to four blocks horizontally from the central rotor.
- Fasten Spikes or active Laser Gates along the outer perimeter of the spinning arms.
- Set the motor to continuous rotation. Any Smiler approaching the bunker walls will be batted away and eliminated by the rotating hazard before they can plant explosives against your outer perimeter.
Defending Traps Against Smiler Sabotage
Smilers frequently deploy thrown bombs and explosive tools to dismantle player fortifications from a safe distance. Unprotected trap wiring is easily destroyed if left exposed:
- Bunker Trap Wiring: Never run raw power lines along exterior walls. Route wires and detector logic behind double-layered iron or obsidian blocks to insulate them against splash damage.
- Angled Blind Corners: Design your entrance with a 90-degree bend right before the trap trigger. This prevents Smilers from throwing bombs straight down the hallway to detonate your Laser Gates before entering the kill zone.
- Overhead Protection: Position reinforced overhangs directly above floor-mounted spikes and detectors to deflect airborne explosives dropped from climbing Smilers.
Maintenance and Trap Cycling Strategies
Even the best automated defense requires active management during late-game horde waves:
- Debris Clearance: Eliminated players and broken props can occasionally snag moving mechanical hinges. Assign one builder inside the safe zone to monitor trap rotation and reset jammed switches if a rotor stalls.
- Manual Override Switches: Always wire a manual backup lever in parallel with automatic proximity sensors. If a sensor is broken by stray explosions, defenders can still toggle the laser grid manually from the observation deck.
- Layered Defense Zones: Never rely on a single trap row. Construct at least two distinct kill zones separated by an airlock door so you can retreat to a secondary defense if the front gate suffers structural failure.
Related Guides
Elimination Mode
Review round mechanics, weapon loadouts, and defensive map locations to secure victory and earn the Expert Survivor badge.
Elevator Designs
Construct working rocket and fan elevators in Build and Survive to transport defenders directly to high ground defense points.
Build and Survive Spinner
Construct functional spinner traps using wheels, rockets, and Laser Gates to defend your base against infected Smilers in Build and Survive.
All Weapons Badge
Discover which eight items you need and where each weapon spawns to earn this challenging survival badge in one life.